Getting started
After you install Coffee Shop you can be import demo content. Bellow links to documentation articles that will help you set up Coffee Shop.
Support
Can’t find an answer or stuck on any of the docs? Email me and I’ll do my best to help.
Ask a question →
Recommended Plugins
Coffee Shop is designed to work out-of-the-box and doesn’t force you to install any plugins.
Plugins listed below extend the functionality of your website but aren’t required.
Jetpack — Adds many useful features that were previously available only for WordPress.com users. Coffee Shop uses Tiled Galleries, Carousel, and Infinite Scroll. Keep in mind that in order to use Jetpack, you’ll need to connect it to your WordPress.com account. Here is a step-by-step guide on how to do it.
Contact Form 7 — allows you to create contact forms that can be easily added to posts, pages, and widgets.
Regenerate Thumbnails — allows you to regenerate thumbnails for your image attachments. Very useful if you’ve changed thumbnail dimensions via Settings → Media or switched the theme.
Importing the Demo Data
Demo data is a collection of posts, pages, comments, and images that you can import to your website and use as a starting point for your own content or study and delete after you feel comfortable working with the theme.
Unfortunately, WordPress doesn’t provide a one-click solution for importing all data from one site to another. There is no way to import Widgets and Customizer settings natively.
We’ll use third-party plugins to do it. But don’t worry, these plugins are trusted among the community, very easy to use, and completely free. And you can safely delete them, once finished importing the data.
Required Plugins
WordPress Importer — for importing the content
Widget Importer & Exporter — for importing Widget settings
Customizer Export/Import — for importing Customizer settings
or use plugin One Click Demo Import - which will import all these 3 settings(content,customizer settings, widgets)
Demo Data Files
You can either download the demo data from the theme page or unzip the coffee-shop-package-X.X.X.zip file. There will be a subfolder called coffee-shop-demo-data with three files in it:
coffee-shop-widgets-X.X.X.wie — contains widget settings.
coffee-shop-customizer-X.X.X.dat — contains Customizer settings.
coffee-shop-data-X.X.X.xml — contains posts, pages, images etc.
Note: X.X.X stands for the current version of the file. It may be 1.0.0 or 1.5.1 or something similar.
Importing the Content
Make sure that Contact Form 7 is installed before you import the demo data. Otherwise, the contact form will not be imported.
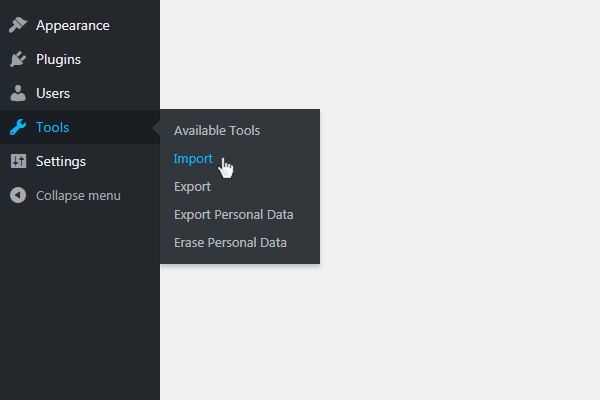
Step 1. In the Dashboard navigate to Tools → Import.
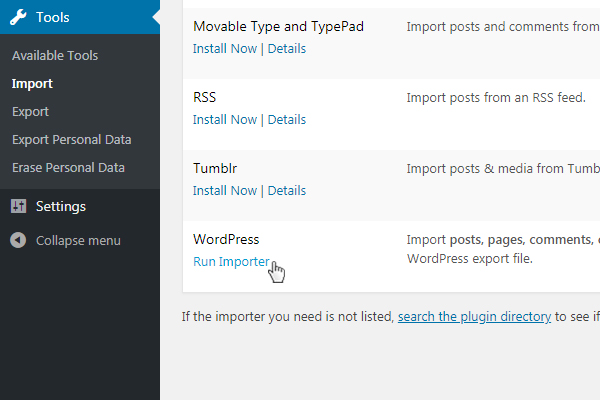
Step 2. Click Run Importer under the WordPress option.
Step 3. In the opened screen click Choose File, locate coffee-shop-data-X.X.X.xml on your computer and click Upload file and import.

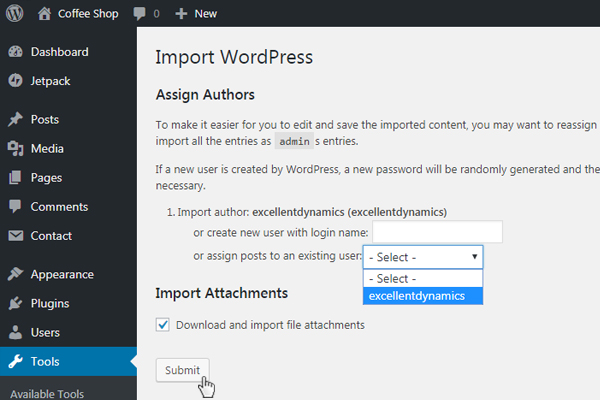
Step 4. Assign all posts to your user, check the box to download file attachments and click Submit.
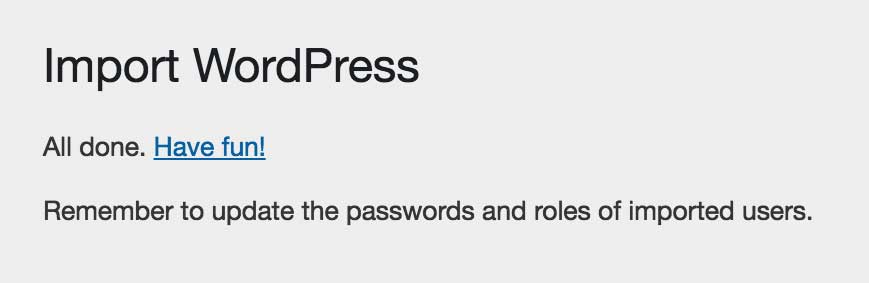
After importing process finishes you’ll see a message that looks something like this:
Importing Widgets
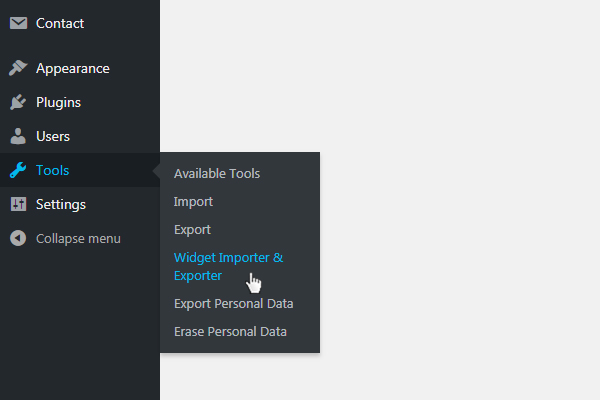
Step 1. In the Dashboard navigate to Tools → Widget Importer & Exporter.
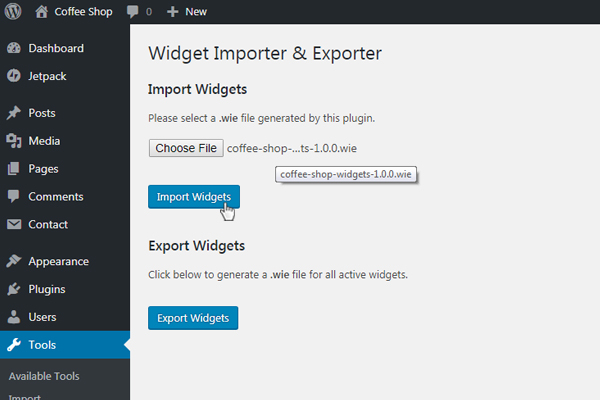
Step 2. In the opened screen click Choose File, locate coffee-shop-widgets-X.X.X.wie and click Import Widgets.
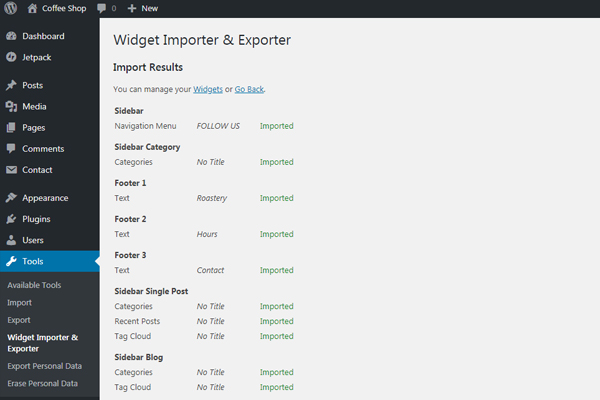
After importing process finishes, you’ll see a screen with a list of widgets that were added to your website.
Importing Customizer Settings
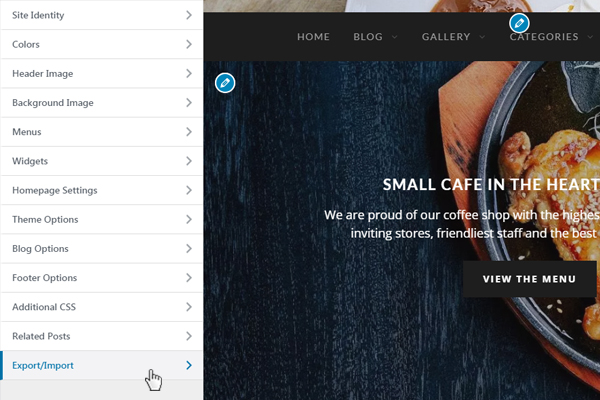
Step 1. Open the Customizer and click on the Export/Import section
Step 2. In the opened panel click Choose File, locate the coffee-shop-customizer-X.X.X.dat file and click Import. Don’t check the checkbox to download and import images because they were already imported with the basic content.
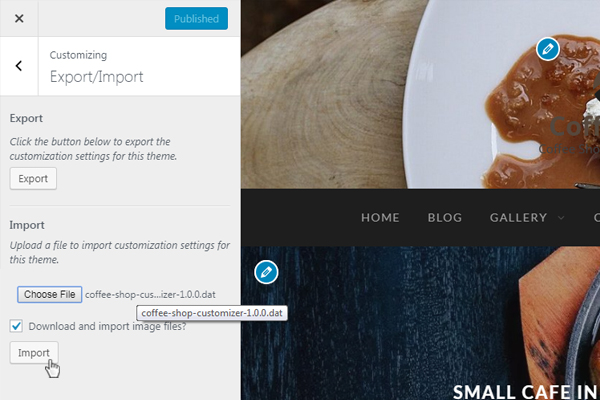
Once you click Import, Customizer will reload and update the settings.
That’s it. You have successfully imported the demo data. The only thing you’ll need to do manually after these steps is set up the front page. Read this guide for more details.
Setting the Static Front Page
The Front Page in Coffee Shop is created with a special template that pulls content for each panel from other pages that you choose.
Front Page
To create a front page like the one you see in the demo, you first need to create and set a static front page.
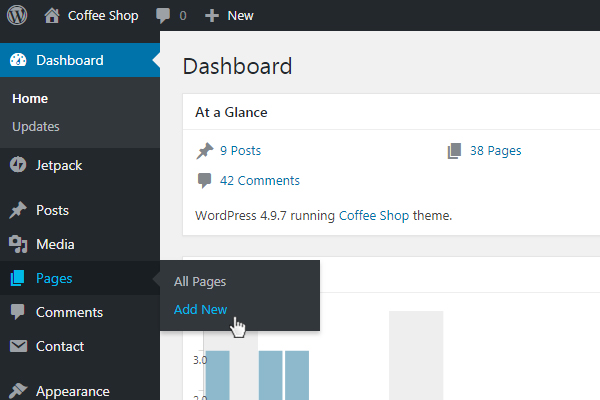
Step 1. Add a new page by clicking on Pages → Add New
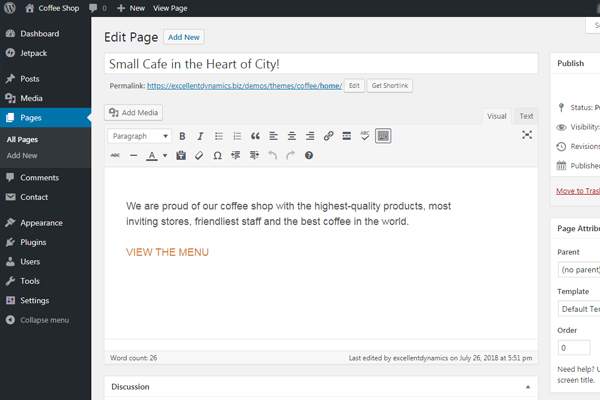
Step 2. Add the title, content, and permalink. The title and content you set here will appear on the front page at the very top, before other panels, in a so-called Hero panel.
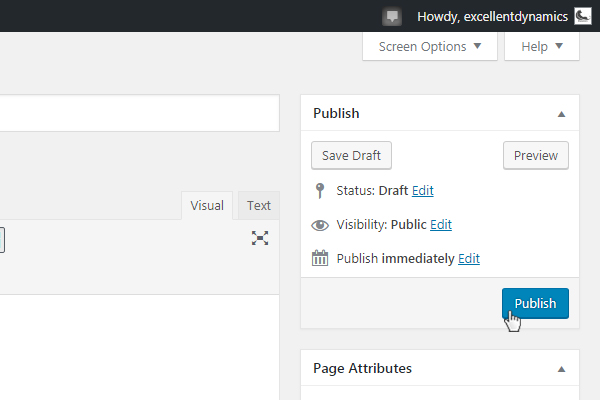
Step 3. When done, publish the page.
Step 4. If you plan to have a blog on your website, create another empty page called Blog and publish it as well.

Step 5. Open the Customizer, navigate to Static Front Page and choose the page we’ve just created in the Front Page select box and the Blog Page in the Posts Page and click Save & Publish.
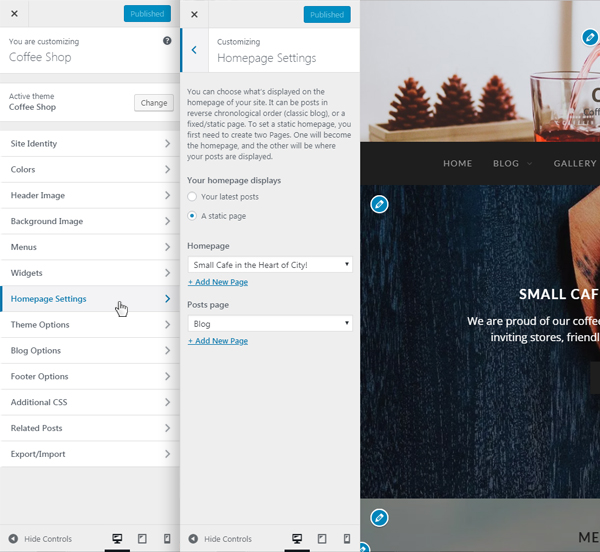
Now that your WordPress site displays the static front page instead of the latest posts, go to the next article to learn how to add other panels to the front page.
Adding Panels to the Front Page
The free version of Coffee Shop has one Hero Panel and four regular panels on the front page. In a paid version, you can set up to 30 panels.
Hero panel always displays the content from the page you set as a static front page. The content for other panels can be set from the Customizer.
To add panels to the front page follow the steps below.
Step 1. Add a new page by clicking on Pages → Add New

Step 2. Add the title, permalink, and content to this page.
Step 3. Open the Customizer and navigate to Theme Options → Panel 1
Note: Make sure, that you are viewing the front page in the preview screen, otherwise controls for editing panels won’t be visible.
Step 4. Choose the page you’ve created in the Step 2 from the Content select box and click Save and Publish.
Step 5. Repeat these steps for each of the panels you want to appear on the front page.
Now that you have all panels in place, proceed to the next article to learn how to customize the look of the panels.
Customizing Panels on the Front Page
Each panel has two options that control its appearance – Background Image and Additional CSS Classes.
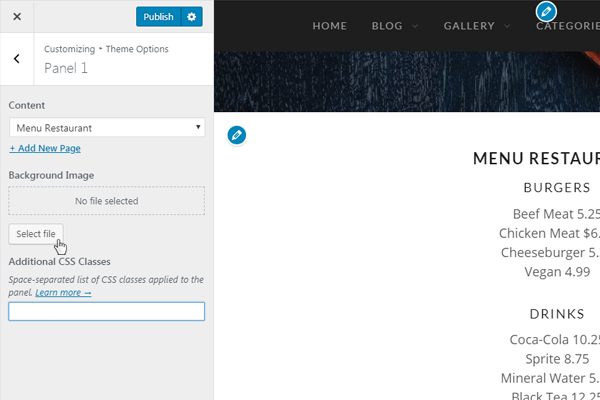
Background Image
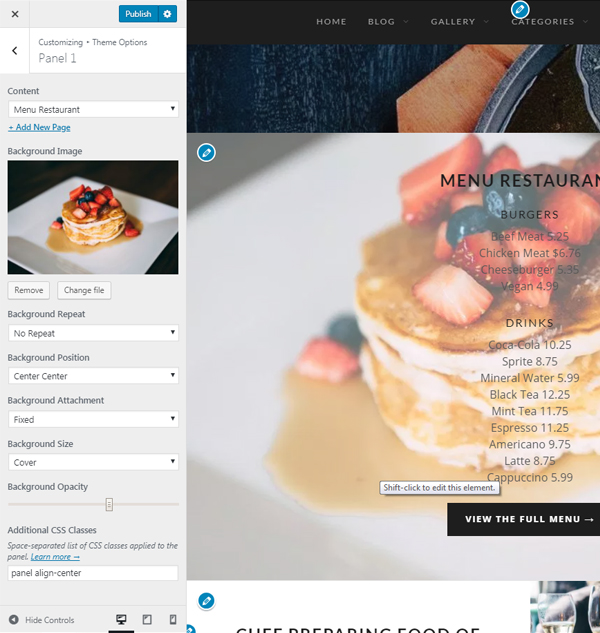
his option allows you to set image background for the panel. In addition to selecting the image, you can choose the Repeat, Position, Attachment, Size, and the Opacity of the background.
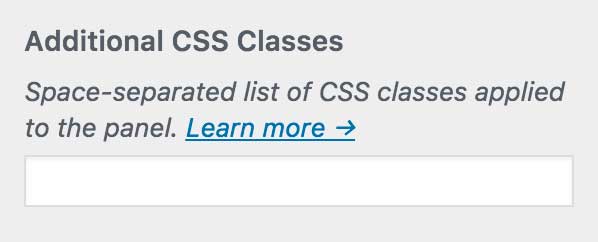
Additional CSS classes
All classes you put to this input field will be applied to the panel. This will allow you to style the panel using CSS later. There are also five classes that are available out of the box to help you tweak the look of the panels.
align-center — aligns the text to the center of the panel.split-left — changes the layout of the panel so the featured image is displayed on the left and the content on the right.split-right — same as previous, but displays the featured image on the right part of the panel.fullwidth — useful when you need to create columns or other kinds of complex layout that require the full width of the panel. The maximum width of the content is 936px.tall — adds top and bottom padding so the panel looks taller.dark — changes the background color to black and text color to white.no-border — removes the bottom border of the panel.
You can combine classes together like so: tall dark no-border or add your own ones to later style them with CSS.
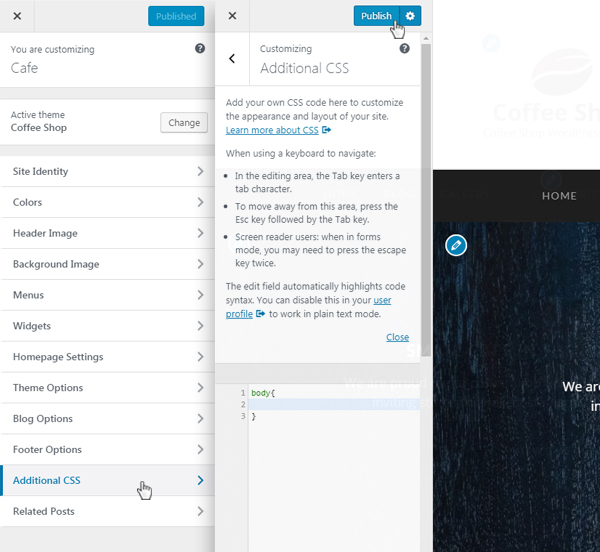
Going Further with CSS
As I mentioned before, you can adjust the panels using CSS. Don’t get scared too quickly, it’s not as difficult as it may sound.
WordPress 4.7 introduced a great feature to Customizer called Additional CSS. Basically, it allows you to add your own CSS styles to the website without having to install any additional plugins or create a child theme. We’ll take advantage of this feature to customize the look of the panels on the front page.
There is an ID that allows you to add unique styles to each panel.
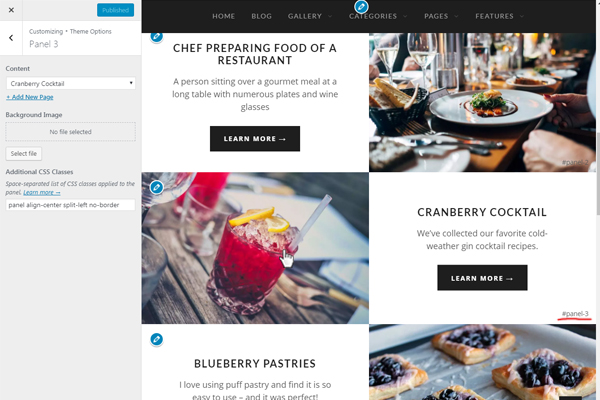
Using that ID you can change colors, alignments, hide elements and do virtually anything with the panel. Here are some examples.
Background Color
#panel-3 {
	background-color: #de7c43;
}
Text Color
#panel-3 {
	color: #ffffff;
}
Panel Title Color
#panel-3 .panel-title
	color: #ffffff;
}
Hide the Panel Title
#panel-3 .panel-title {
	display: none;
}
Adjust the Vertical Size of the Panel
#panel-3 {
	padding-top: 10%;
  padding-bottom: 10%;
}
All Styles Combined
#panel-3 {
    color: #ffffff;
    background-color: #de7c43;
    padding-top: 10%;
    padding-bottom: 10%;
}

#panel-3 .panel-title {
    color: #ffffff;
}
As you can see, with just a little bit of knowledge of CSS, you can do virtually anything with this theme without having to install any page builders or other plugins.
How to Change the Number of Panels on the Front Page
By default, Coffee Shop has one Hero Panel and four regular panels. If you need to add more panels on the front page, follow the steps below:
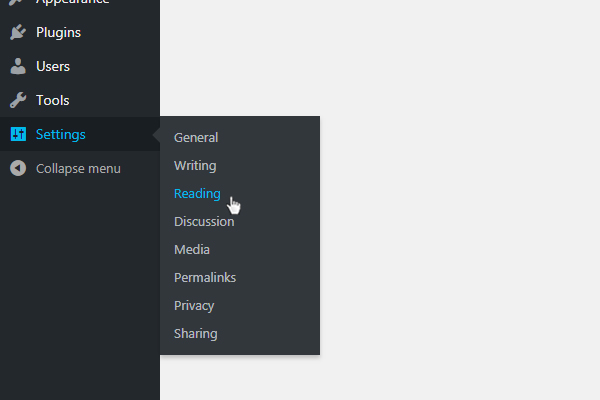
Step 1. Navigate to Settings → Reading.
Step 2. Set the desired number of panels at the bottom part of the screen as shown on the screenshot below and save the settings.
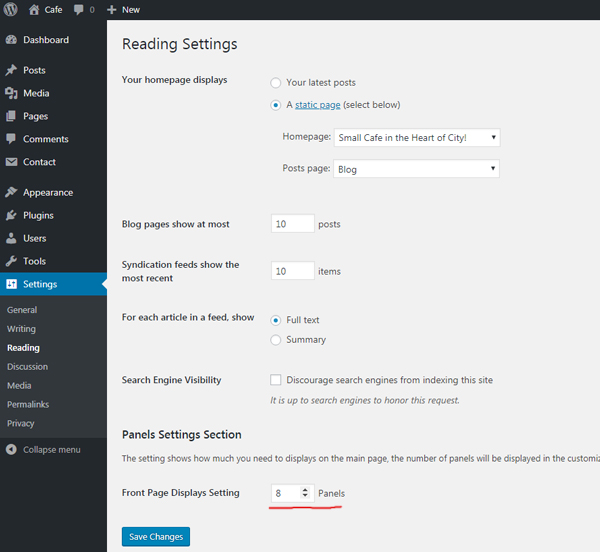
Note: Number of panels is limited to 30 for performance reasons.
Creating the Menu
Coffee Shop has one menu location in the header section of the website. This menu can be three-level deep on desktop screens and hides behind the burger icon on mobile devices.
Creating a One-Page Menu
You can also use this menu location to create a one-page style menu. That is the menu, that smoothly scrolls the screen to a certain panel when you click on a corresponding menu item.
Let’s say you want to make a menu item Menu scroll the page to the first panel. To do that use Custom Links section in the menu-editing screen and type #panel-1 to the URL field.
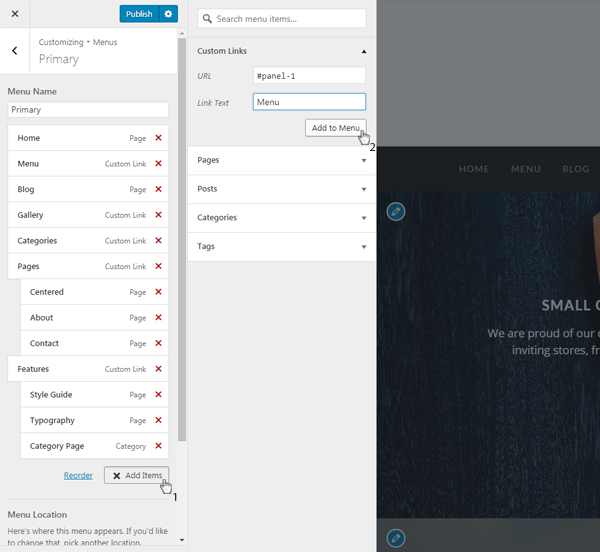
Following the same logic, you can create a link to any other panel by setting the number accordingly. E.g. #panel-1 or #panel-6.
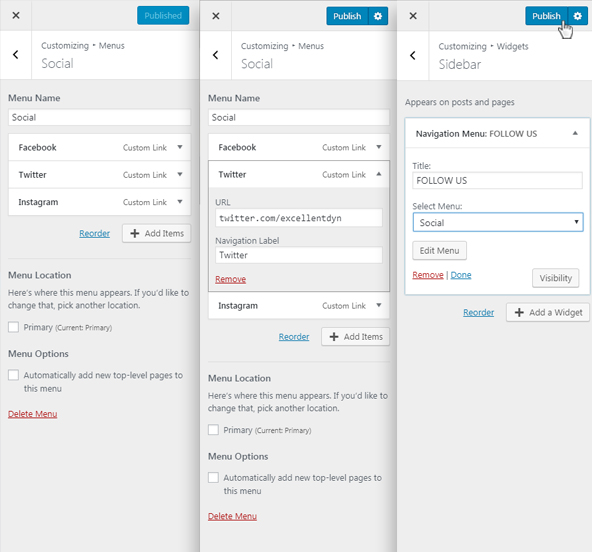
Social Menu in a Widget
Coffee Shop allows you to create a menu with social icons that will appear next to each menu item.
To create a menu like this, simply call it Social, and use Custom Link option to add links to your social profiles. Coffee Shop will recognise the links and add icons automatically.
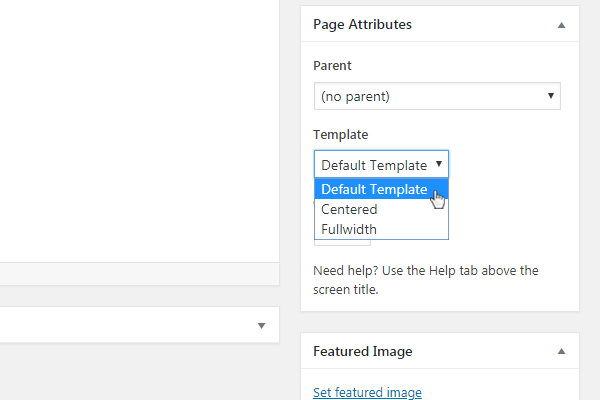
Page Templates
Coffee Shop supports three page templates:
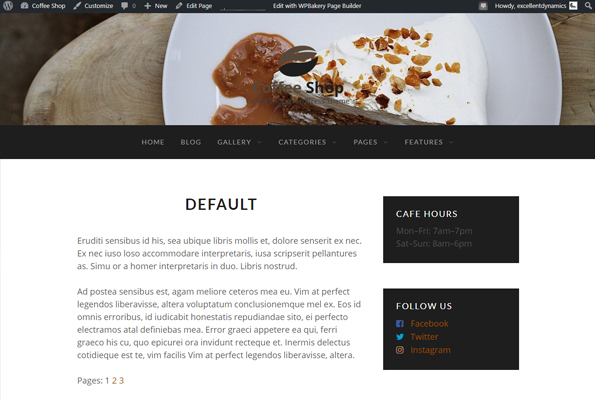
- Default template displays content on the left and sidebar on the right. If the sidebar is empty, this template displays the content in the middle of the page.
- Centered template displays content in the middle of the page and disables the sidebar.
- Fullwidth template also disables the sidebar but uses the full width of the site for content.
You can select the template for a page using the select box in the Page Attributes widget as seen in the screenshot below.
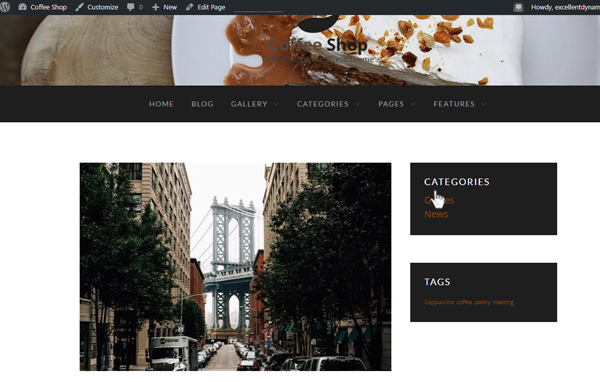
Widget Locations
Coffee Shop supports eight widget locations. One in the sidebar on the Default blog layout, category template, single post template and Default page template:
And four columns for widgets in the footer:
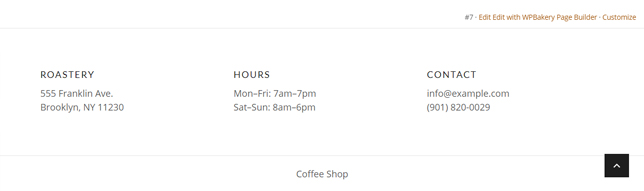
Note: Footer widget locations have a dynamic width, meaning that if you are using three, each widget location will take one-third of the width of the site, as shown in the screenshot above.
Widget Text Alignment
You can optionally change the text alignment of the widgets, using the CSS. To do that copy and paste one of the snippets below to the Additional CSS panel in the Customizer.
All Widgets in All Locations
.widget {
    text-align: center;
}
Sidebar Only
#secondary .widget {
    text-align: center;
}
Footer Only
#colophon .widget {
    text-align: center;
}
Widget Visibility
Sometimes it is necessary to hide some widgets on selected pages. To do that you can use Widget Visibility module that comes with Jetpack. With this module enabled, you’ll be able to create rules for each widget and control on which pages it should appear.
Helper Classes
Apart from columns, Coffee Shop has other useful CSS classes that can help you style your content. Below is the list of these classes with code examples and descriptions.
Muted Text
<span class="muted">Muted text</span>
Muted text will be 50% transparent. Works with paragraphs, headings, spans, and other text elements.
Drop Cap
<span class="dropcap">C</span>offee...
Use drop cap to highlight the beginning of an article. To add a drop cap, simply wrap the first letter with a span with a dropcap class.
Highlight
<span class="highlight">Highlighted text</span>
To draw user’s attention to a specific phrase, wrap the words you need to be highlighted with the highlight class.
Lead Dots
<p class="lead-dots"><span>Americano</span> <span>2.5</span></p>
Lead dots may be useful to create simple menus or service lists like the one you see in the demo. To add lead dots add a lead-dots class to a paragraph or a heading, and wrap the name of the service and the price in spans.