Getting started
After you install Velo you can be import demo content. Bellow links to documentation articles that will help you set up Velo.
Support
Can’t find an answer or stuck on any of the docs? Email me and I’ll do my best to help.
Ask a question →
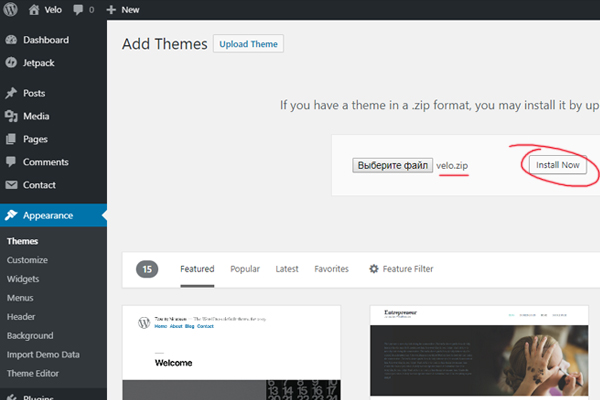
Installation via WordPress Theme Installer
- Login to your WordPress Dashboard, go to Appearance → Themes.
- At the top, click Add New, then click Upload Theme.
- Choose the velo.zip zip file within the whole package downloaded from ThemForest.
- Click Install Now.
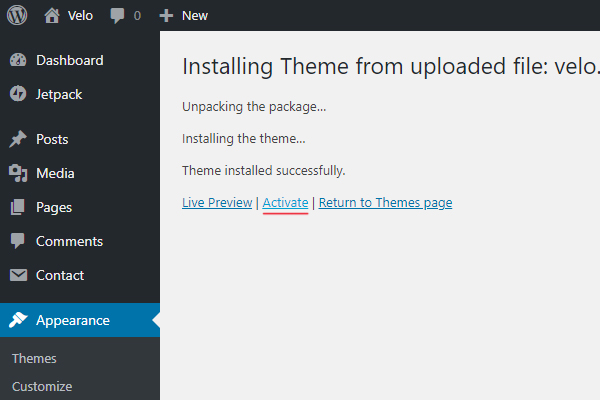
- The last step is to click Activate once all the files uploaded.
Step 1. In the Dashboard navigate to Appearance → Themes.

Step 2. At the top, click Add New, then click Upload Theme.
Choose the velo.zip and Click Install Now.
Step 3. The last step is to click Activate once all the files uploaded.
Installation via FTP
- Login to the SFTP/FTP account for your site.
- Navigate the to the WordPress directory, and follow the path wp-content/themes.
- Extract velo.zip file (it’s in the zip file you downloaded) and upload the velo folder.
- Once it’s uploaded, go to your WordPress Dashboard, browse to Appearance > Themes.
- You will see the screenshot for the Velo theme, click the Activate link and you are ready to go.
Recommended Plugins
Velo is designed to work out-of-the-box and doesn’t force you to install any plugins.
Plugins listed below extend the functionality of your website but aren’t required.
Jetpack — Security, performance, and site management: the best way to WordPress is with Jetpack.
One Click Demo Import — The best feature of this plugin is, that theme authors can define import files in their themes and so all you (the user of the theme) have to do is click on the "Import Demo Data" button.
Contact Form 7 — allows you to create contact forms that can be easily added to posts, pages, and widgets.
Regenerate Thumbnails — allows you to regenerate thumbnails for your image attachments. Very useful if you’ve changed thumbnail dimensions via Settings → Media or switched the theme.
Required Plugins (for manual import)
WordPress Importer — for importing the content
Widget Importer & Exporter — for importing Widget settings
Customizer Export/Import — for importing Customizer settings
or use plugin One Click Demo Import - which will import all these 3 settings(content,customizer settings, widgets)
Demo Data Files
You can either download the demo data from the theme page or unzip the Velo package file. There will be a subfolder called Demo Content(Manual Install) with three files in it:
widgets.wie — contains widget settings.
customizer.dat — contains Customizer settings.
content.xml — contains posts, pages, images etc.
Note: it contains the current demo.
Importing the Content
Make sure that Contact Form 7 is installed before you import the demo data. Otherwise, the contact form will not be imported.
Importing the Demo Data (One Click Method)
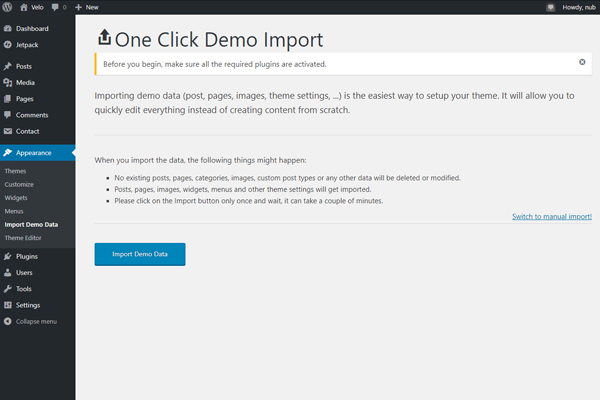
The theme comes with the demo content that you can import with one click button.
First, you will need to manual install the One Click Demo Import plugin then activate it or install this as recomended plugin after activate theme Velo.
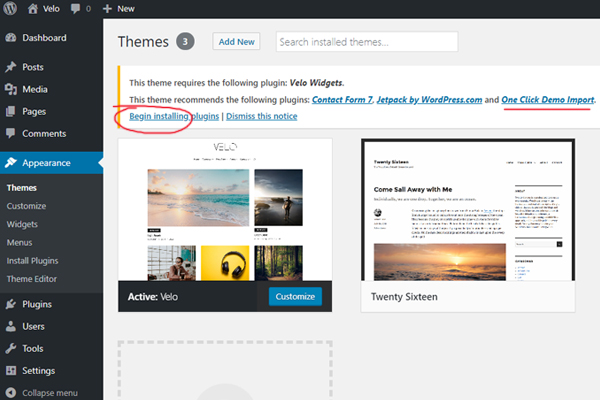
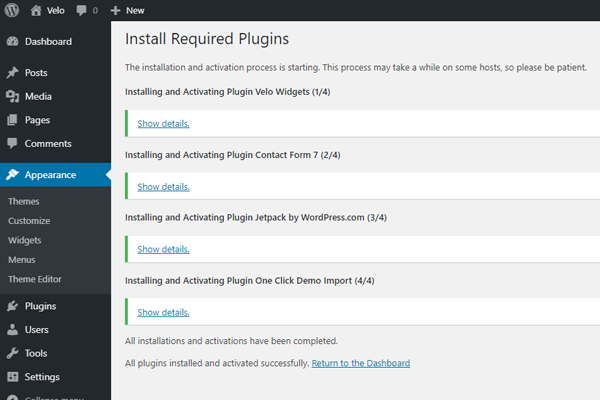
Step 1. Click Begin installing plugins for installing plugins.
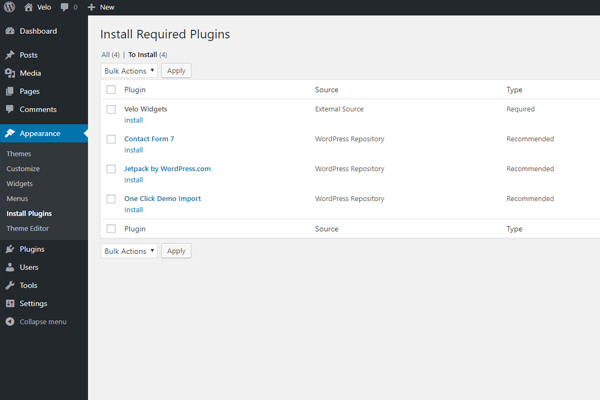
Step 2. Checked all and choose Install and click button "Apply".
Step 3. All plugins installed and activated successfully. Clicl to link "Return to the Dashboard".
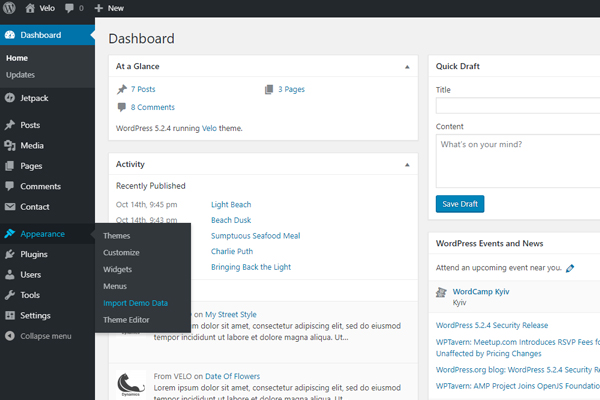
Second, go to Appearance > Import Demo Data and click the Import Demo Data button. It will take a few seconds, then you are done and have the demo content installed.
And click on button "Import Demo Data" for import demo content.
Importing the Demo Data (Manual)
Demo data is a collection of posts, pages, comments, and images that you can import to your website and use as a starting point for your own content or study and delete after you feel comfortable working with the theme.
Unfortunately, WordPress doesn’t provide a one-click solution for importing all data from one site to another. There is no way to import Widgets and Customizer settings natively.
We’ll use third-party plugins to do it. But don’t worry, these plugins are trusted among the community, very easy to use, and completely free. And you can safely delete them, once finished importing the data.
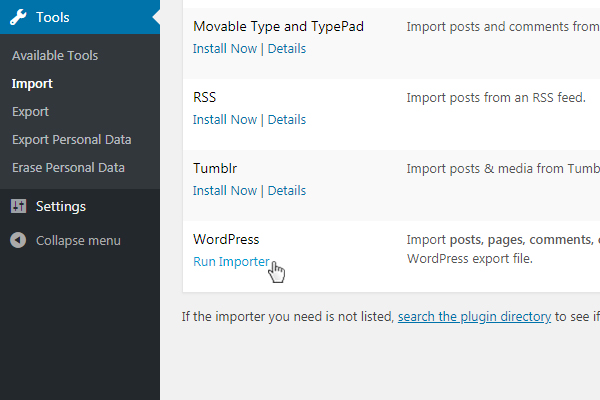
Step 1. In the Dashboard navigate to Tools → Import.
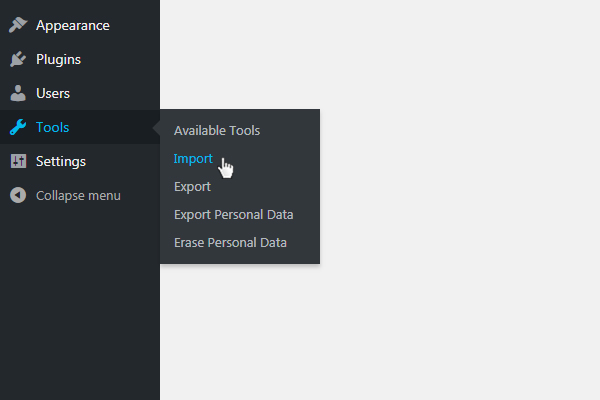
Step 2. Click Run Importer under the WordPress option.
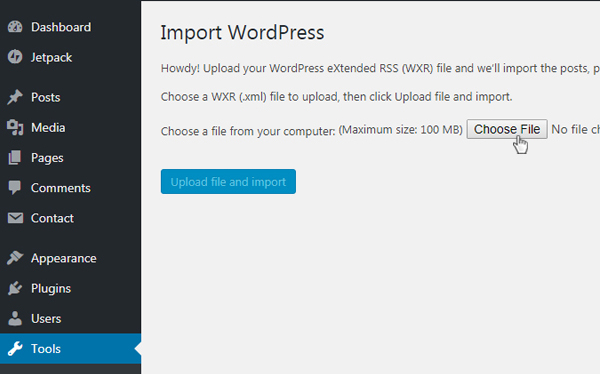
Step 3. In the opened screen click Choose File, locate content.xml on your computer and click Upload file and import.
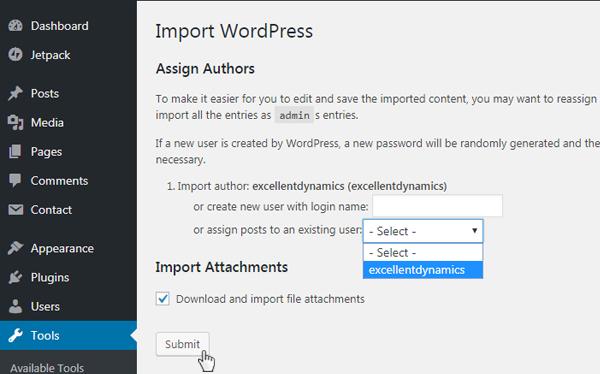
Step 4. Assign all posts to your user, check the box to download file attachments and click Submit.
After importing process finishes you’ll see a message that looks something like this:

Importing Widgets
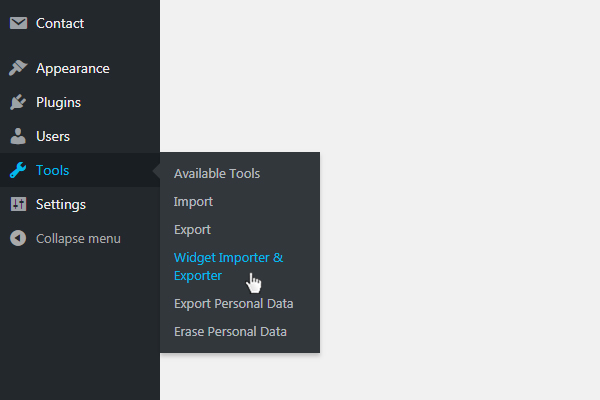
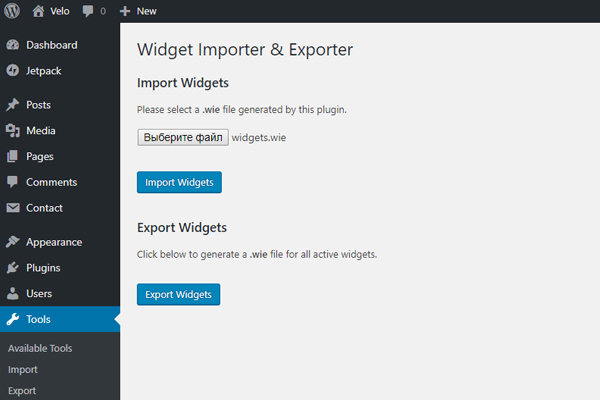
Step 1. In the Dashboard navigate to Tools → Widget Importer & Exporter.
Step 2. In the opened screen click Choose File, locate widgets.wie and click Import Widgets.
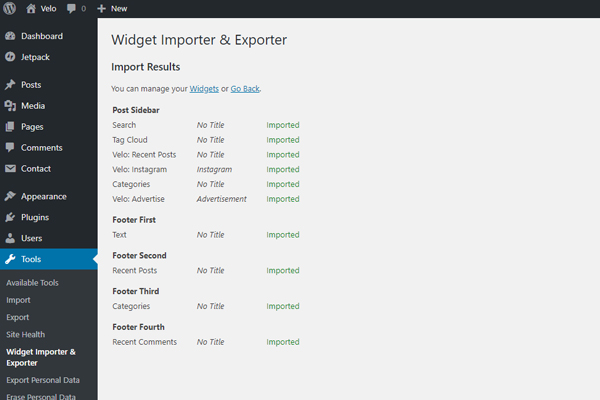
After importing process finishes, you’ll see a screen with a list of widgets that were added to your website.
Importing Customizer Settings
Step 1. Open the Customizer and click on the Export/Import section
Step 2. In the opened panel click Choose File, locate the customizer.dat file and click Import. Don’t check the checkbox to download and import images because they were already imported with the basic content.
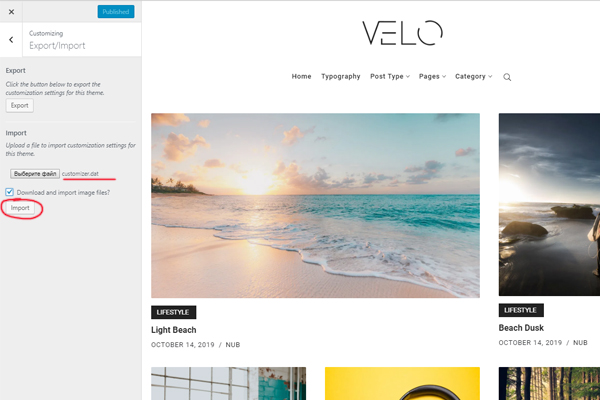
Once you click Import, Customizer will reload and update the settings.
That’s it. You have successfully imported the demo data.
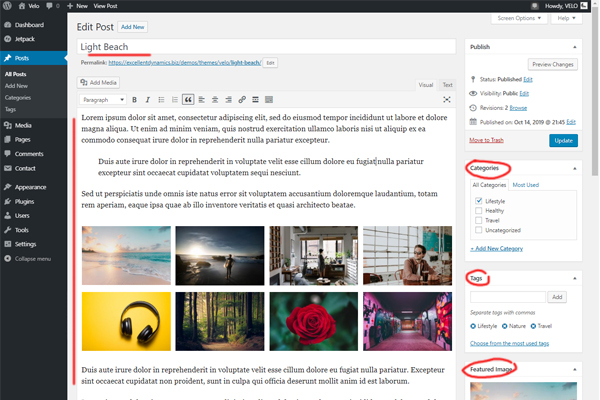
Adding Posts
- Go to Posts → Add New.
- Add a title.
- Select a post Category.
- Add some relevant Tags.
- Choose a Featured Image.
- Write your post content in the content area.
- Click Publish and you’re all done.
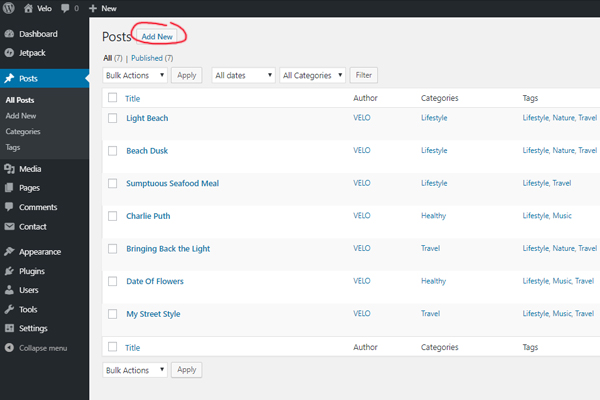
Fill in all the fields and clicks button "Publish". Post added.
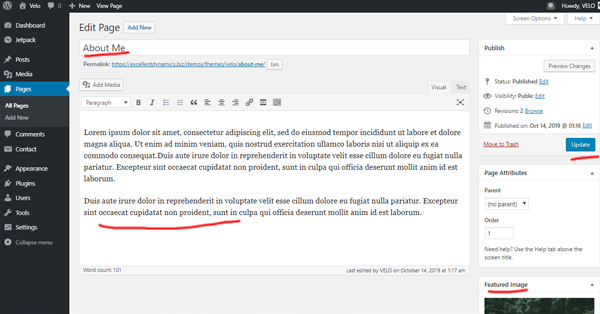
Adding Pages
- Go to Pages→ Add New.
- Add a title.
- Set the Page Attributes like the Parent or leave the default one.
- Choose a Featured Image.
- Write your post content in the content area.
- Click Publish and you’re all done.
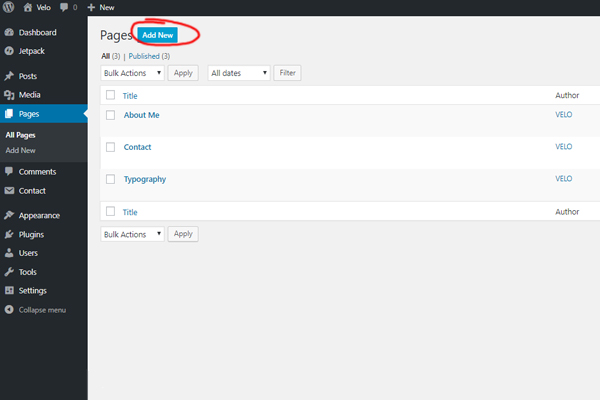
Fill in all the fields and clicks button "Publish". Post added.
Widget Locations
The footer section has four registered widget sections. Widgets could be added to these areas by navigating to Appearance > Widgets.
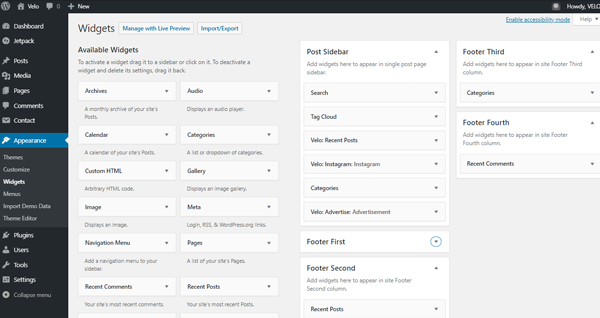
You can add the Instagram widget to the blog sidebar or blog footer.
You can drag the Velo: Instagram from the widgets list to the Post Sidebar or any Footer widget section.
Then, you will need to get your account userId and accessToken from the following URLs:
- userId: http://codeofaninja.com/tools/find-instagram-user-id/
- accessToken: instagram.pixelunion.net
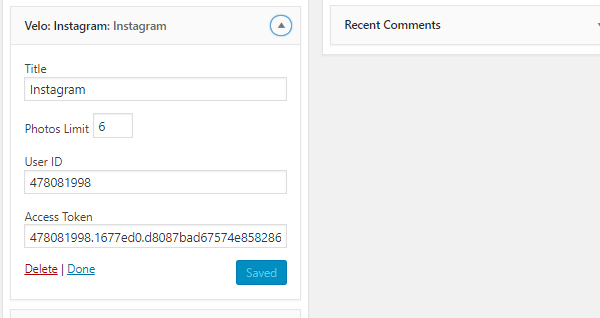
You can control how much images to show by changing the limit number. Theme default is set to 3 images.
Menus
To create a new menu:
- Navigate to WordPress Dashboard > Appearance > Menus
- You can see a panel where you can create a new menu, click create a new menu link to create one.
- Give the new menu a name, for example, Primary Menu, then click the Create Menu button to create it.
- From the drop-downs on the left, choose the content to add to your menu.
- Nest & position menu items by dragging & dropping them.
- Be sure to check the box to set the menu as “Primary Menu” from the Display location option.
- Save menu
Social Menu
- You can create a new menu following the above Menus steps.
- From the left Custom Links, add custom link to each social media site.
- Assign the menu to the Social Menu location in the Display location option.
Velo is using Social Logos. You can look this gallery for all the available icons.
Contact Page
The first thing you can do is to install and activate the Contact Form 7 plugin.
Creating the Form
- From WordPress Dashboard, navigate to Contact > Add new.
- Now you are on the contact form page, set a form title, then and you can see different tabs which are the following:
- Form: You can customize the form and how it will look like with some simple HTML code.
- Mail: You can set different things like your email address and customize the message body.
- Messages: You can set different messages visitors can see in different scenarios while sending a message.
- Additional Settings: You can add customization code snippets.
- Once finished the form customization, click the Save button.
- Once saved, you will get a new code snippet highlighted in blue. This code will be used with the WordPress page, so please copy it.
Creating the Page
- From WordPress Dashboard, create a Contact page by navigate to Pages > Add new.
- Paste the generated contact form code into the page text box.
- Now, your page is ready with the new contact form which you can then publish.
Galleries
The demo is using the Tiled Galleries which is a Jetpack add-on that enables to display your galleries in different new styles.
First, install Jetpack and then follow this guide which will introduce you to Tiled Galleries and how to configure and create new galleries with it.
Translation
The Velo theme is fully ready to be translated into other languages and could be easily translated with poedit.net application.
The theme contains the main translation file velo.pot inside the languages directory which will be used by the poedit application.
Here are simple steps:
- Install poedit and open it.
- Once the app is opened click Create new translation.
- Choose velo.pot the file inside the theme velo/language directory.
- Once the translation is done, save the file according to your language code. Find a list of language codes at WordPress in your Language.As an example, the language code for English (UK) is en_GB, so you will end up with two new files: en_GB and then en_GB.mo.
- When that’s done, simply upload the files to velo/language folder using FTP.
- Change the site language by going to WordPress > General > Settings and choose the target language from Site Language drop-down menu.
Credits
Velo have used the following scripts, fonts or other files as listed.
- Evil Icons
- FitVids.js
- Preview Images form unsplash.com